Managing Your Account
The Profile page is your hub for managing personal details, security settings, email preferences, and API access. You can also delete your account here if needed.
Prerequisites
- Active Reputic account
Accessing Your Profile
Click Profile in the bottom section of the sidebar to open your account settings.
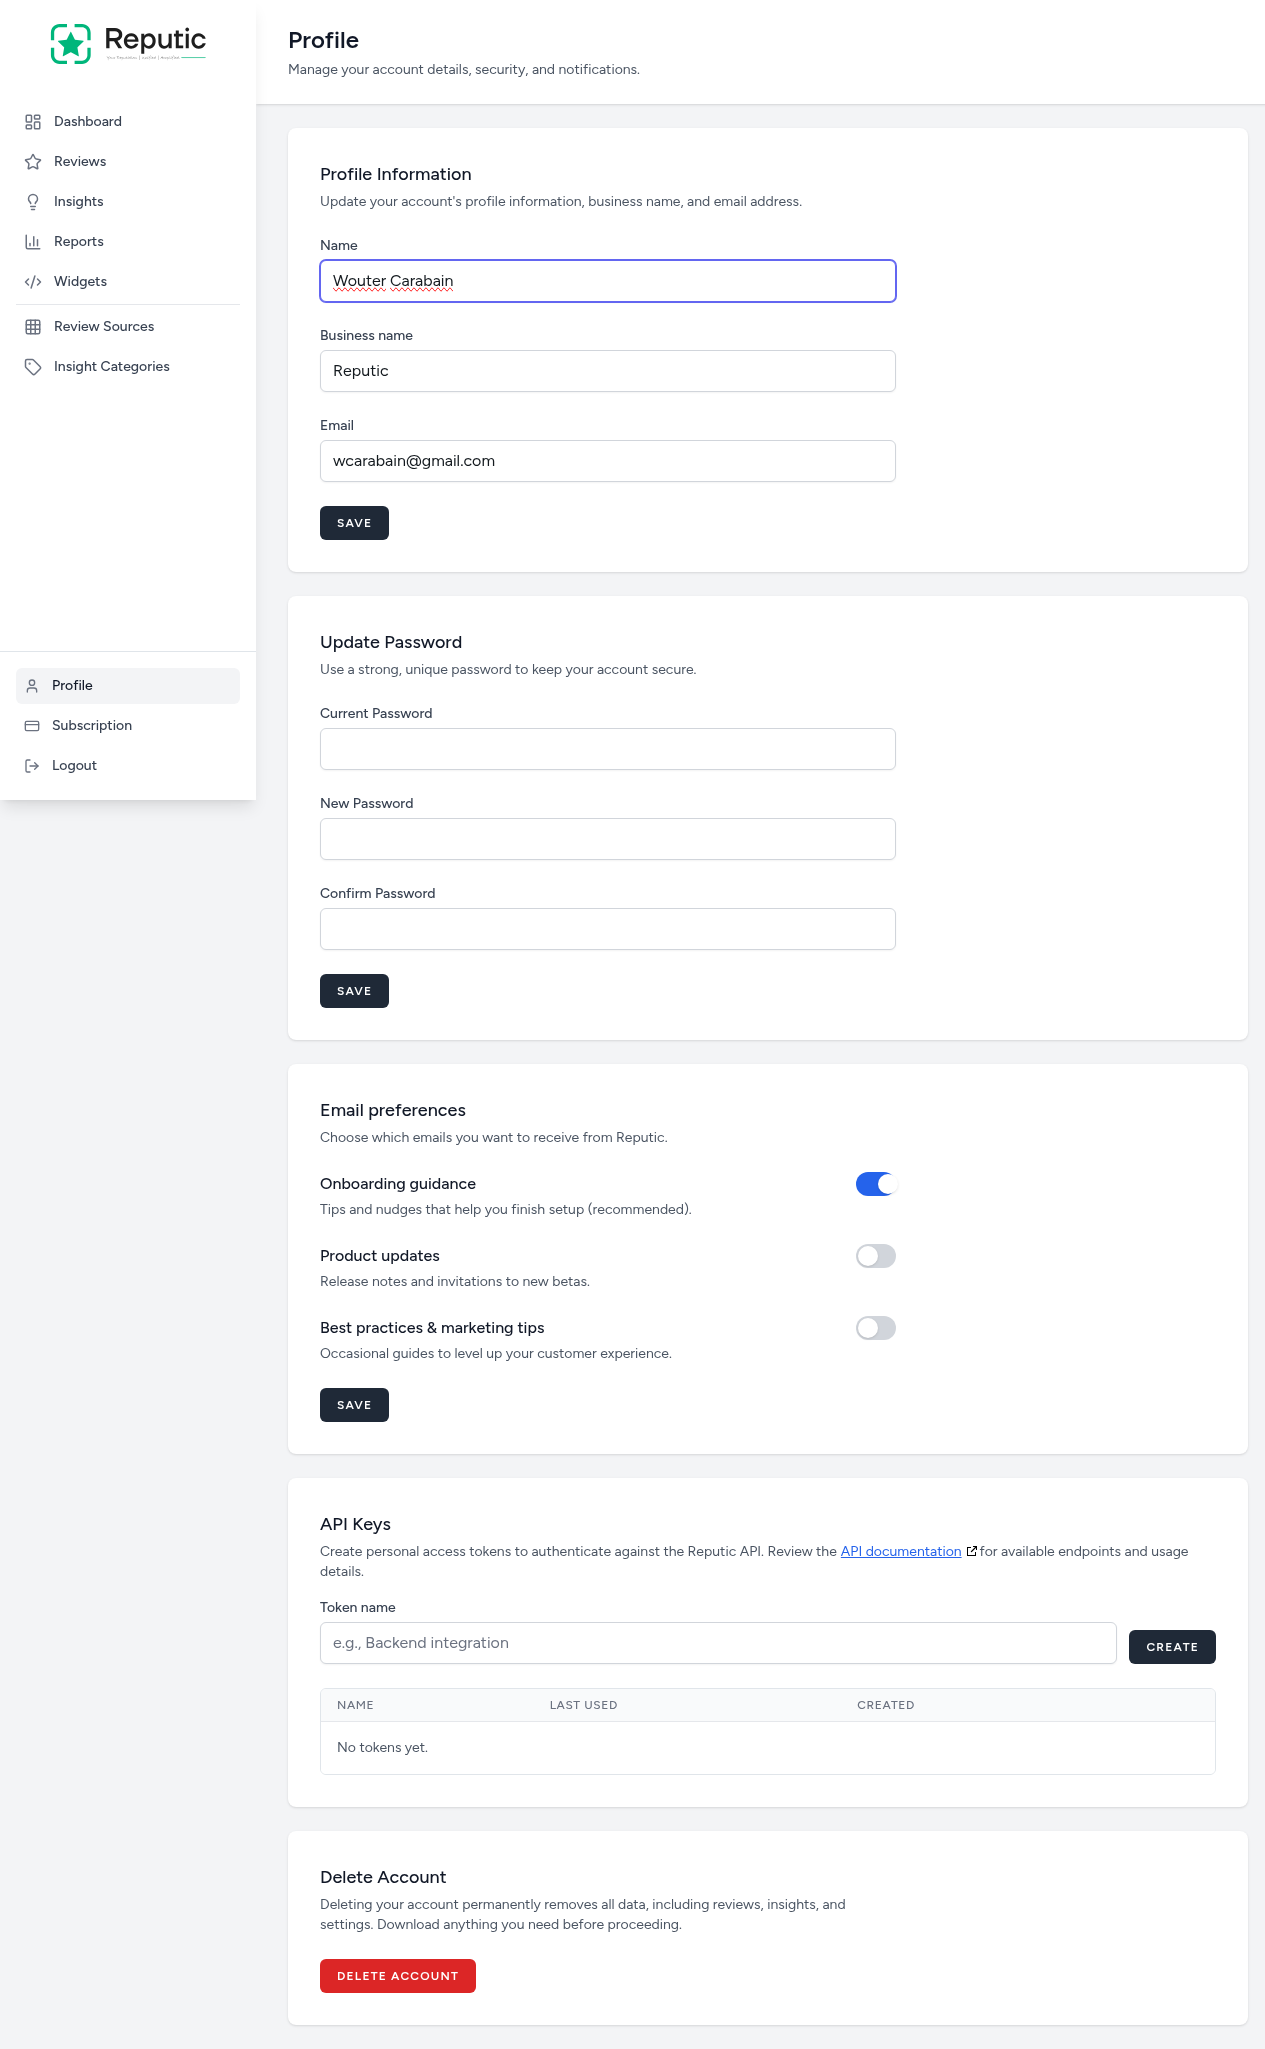
The page contains five sections, each with its own Save button so you can update settings independently.
Profile Information
Update your name, business name, and email address.
- Name: Your display name across the platform
- Business name: The name shown on dashboards, reports, and widgets
- Email: Your login email and where notifications are sent
To update:
- Edit the fields you want to change
- Click Save
Note: Changing your email address may require you to verify the new address before it takes effect.
Update Password
Keep your account secure by updating your password regularly.
- Enter your Current Password
- Enter your New Password
- Re-enter it in the Confirm Password field
- Click Save
Pro Tip: Use a strong, unique password with a mix of letters, numbers, and symbols. A password manager makes this easy.
Email Preferences
Choose which emails you want to receive from Reputic. Each preference has a toggle and its own description:
| Preference | Description |
|---|---|
| Onboarding guidance | Tips and nudges that help you finish setup (recommended) |
| Product updates | Release notes and invitations to new betas |
| Best practices & marketing tips | Occasional guides to level up your customer experience |
Toggle each preference on or off, then click Save to apply your choices.
Pro Tip: Keep "Onboarding guidance" enabled until you've connected all your review sources and explored every feature. It helps you get the most out of Reputic.
API Keys
Create personal access tokens to authenticate against the Reputic API. Use these tokens to integrate Reputic data into your own tools and workflows.
Creating a Token
- Enter a descriptive name in the Token name field (e.g., "Backend integration")
- Click Create
- Copy the token immediately, it won't be shown again
Managing Tokens
The token table shows all your active tokens with:
- Name: The label you gave the token
- Last used: When the token was last used for an API request
- Created: When the token was created
You can revoke any token to immediately disable its access.
Note: Review the API documentation (linked on the page) for available endpoints and usage details.
Delete Account
Warning: Deleting your account permanently removes all data, including reviews, insights, and settings. This action cannot be undone.
If you need to delete your account:
- Scroll to the Delete Account section at the bottom of the page
- Click Delete Account
- Confirm the deletion in the dialog
Make sure to download any reports or data you need before proceeding. Deleting your account is separate from canceling your subscription, if you only want to stop paying, see Managing Your Subscription instead.
Tips
Pro Tip: Update your business name if your company rebrands. The new name will automatically appear across your dashboard, reports, and widgets.
Pro Tip: Create separate API tokens for each integration. If one needs to be revoked, the others continue working.
Need help? Contact Support